How to Grow Ginger Root at Home: Complete Guide to Planting, Caring, and Harvesting Zingiber officinale
Table of Contents
- Introduction: Why Grow Your Own Ginger?
- Quick Botanical Facts
- Health & Culinary Benefits of Fresh Ginger Root
- Choosing the Right Site or Container
- Planting Ginger Rhizomes Step-by-Step
- Season-long Care: Light, Water, and Fertilizer
- Pruning, Mulching, and Overwintering
- Propagation Tips: Grocery Store Ginger vs. Seed Pieces
- Harvesting, Curing & Storing Ginger
- Pest & Disease Management
- Cooking with Home-Grown Ginger: Ideas & Storage Hacks
- Frequently Asked Questions
- Conclusion
Introduction: Why Grow Your Own Ginger?
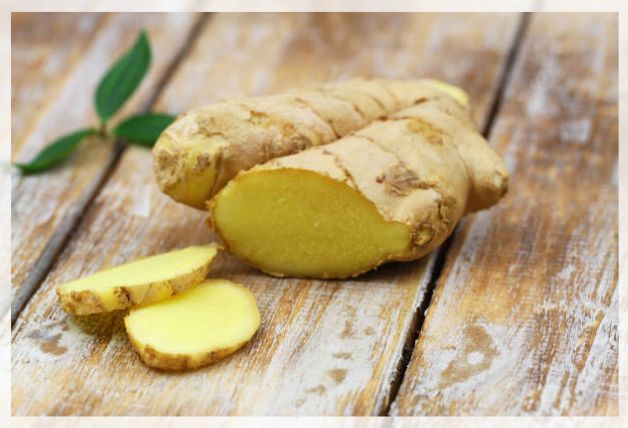
Fresh ginger root is a kitchen powerhouse—pungent in savory stir-fries, soothing in herbal tea, and indispensable in holiday baking. Buying a knob at the supermarket is easy, but growing ginger at home gives you:
- Unbeatable freshness and stronger flavor from just-harvested rhizomes.
- A year-round supply for pennies compared with store prices.
- An attractive tropical plant that doubles as a houseplant or patio accent.
- Control over pesticides and fertilizers—perfect for organic gardeners.
Although ginger is a true tropical species, anyone—whether in Dubai’s heat or a temperate climate—can raise a healthy crop indoors or in a summer container. Follow this in-depth guide to master every stage, from sprouting supermarket rhizomes to harvesting plump, aromatic ginger root eight to ten months later.
Quick Botanical Facts
| Botanical name | Zingiber officinale |
|---|---|
| Family | Zingiberaceae (with turmeric & cardamom) |
| Plant type | Herbaceous perennial rhizome |
| Mature size | Up to 1.2 m (4 ft) tall, 0.6 m (2 ft) wide |
| Hardiness | USDA Zones 8–12 outdoors; container elsewhere |
| Light | Bright filtered sun or morning sun/afternoon shade |
| Soil | Rich, well-drained loam high in organic matter |
| pH | 6.0 – 7.5 (neutral to slightly alkaline) |
| Time to harvest | 8–10 months (baby ginger at 5 months) |

Health & Culinary Benefits of Fresh Ginger Root
The zesty bite of raw ginger comes from gingerols, potent phytonutrients with proven anti-inflammatory, antioxidant, and digestive benefits. When heated or dried, gingerols convert to zingerone, producing the warm, sweet aroma familiar in baked goods. Adding fresh ginger to your diet may help:
- Relieve nausea and motion sickness
- Reduce joint pain and inflammation
- Boost immunity thanks to antimicrobial compounds
- Balance blood sugar and promote heart health
From sushi pickles to masala chai, stir-fry to cookies, home-grown ginger elevates everyday meals and supports wellness.
Choosing the Right Site or Container
Outdoor growers in true tropical or subtropical zones (USDA 9–12) can plant ginger in fertile garden beds with filtered light. Everyone else should select a pot at least 30 cm (12 in) deep with drainage holes. A wide, shallow container—like a window box or half wine barrel—maximizes horizontal rhizome expansion.
- Avoid cold drafts and midday scorching sun.
- Provide 65 – 85 °F (18 – 29 °C) during active growth.
- Use a moisture-retaining, free-draining potting mix: 2 parts peat-free compost : 1 part coconut coir : 1 part perlite.
Planting Ginger Rhizomes Step-by-Step
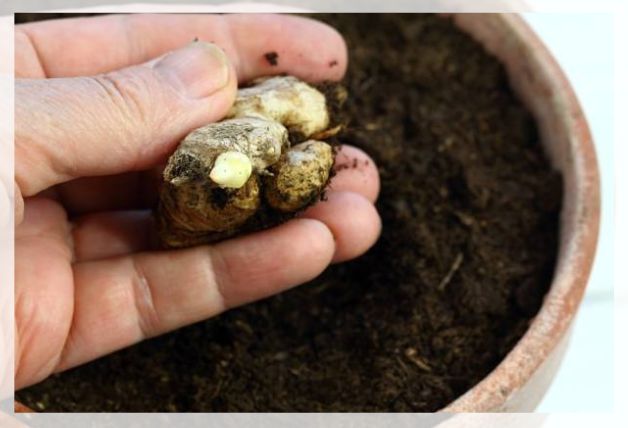
- Select seed pieces: Choose plump organic ginger with multiple “eyes” (growth buds). Avoid shriveled or moldy chunks.
- Pre-sprout (optional): Soak rhizomes in warm water for 4 hours, then place in a tray of damp coco coir in a warm spot for one week until buds green.
- Cut & cure: Divide rhizome into 3–5 cm (1–2 in) pieces, each with at least one eye. Air-dry 24 hrs to heal cut surfaces.
- Plant horizontally 2 cm (¾ in) deep, buds facing up, spaced 15 cm (6 in) apart.
- Water lightly and keep medium just moist until shoots appear (2–4 weeks).
Season-long Care: Light, Water, and Fertilizer
Soil and pH Requirements
Ginger hates wet feet. Amend heavy clay with ample compost, leaf mold, and horticultural sand. Maintain pH 6.0–7.5; add garden lime if soil is overly acidic.
Watering Schedule
- Sprouting stage: Mist or drip-water to keep medium barely damp—overwatering leads to rot.
- Peak growth (summer): Provide 2 – 3 cm (1 in) of water weekly. Mulch with straw or cocoa husks to stabilize moisture.
- Dormancy (winter): Once foliage yellows, reduce watering to prevent soggy soil while rhizomes rest.
Feeding for Bigger Rhizomes
Ginger is a heavy feeder. Apply an organic granular fertilizer high in phosphorus (e.g., 5-5-5) at planting and again mid-season. Every two weeks, drench with liquid kelp or fish emulsion to supply micronutrients.

Pruning, Mulching, and Overwintering
Ginger foliage requires little pruning—simply clip dead stems after they yellow in late autumn. Mulch 5 cm (2 in) deep with shredded bark to trap humidity and suppress weeds. In USDA zones below 8:
- Dig up containers before frost and bring indoors to a bright, cool room at 55 °F (13 °C).
- Withhold fertilizer and water just enough to keep soil from bone-drying.
- Move pots back outside once night temps consistently exceed 55 °F.
Propagation Tips: Grocery Store Ginger vs. Seed Pieces
Commercial ginger is often treated with growth inhibitors, so organic produce or certified “seed-ginger” gives higher success. If grocery rhizomes fail to sprout, soak for 24 hours in warm water laced with 1 tsp baking soda and a splash of hydrogen peroxide to remove chemicals and pathogens.
While Z. officinale rarely sets viable seed, experimental breeders sometimes produce cultivars via tissue culture for disease-free planting stock—useful for serious growers aiming at market production.
Harvesting, Curing & Storing Ginger
Eight to ten months after planting, foliage will naturally yellow—your cue to dig the rhizomes.
- Loosen soil with a garden fork, lifting clumps gently to avoid bruising.
- Trim tops to 2 cm (¾ in). Wash off soil under gentle spray.
- Cure in a shaded, airy place one week to toughen skin for storage.
- Store unpeeled ginger in a breathable bag in the crisper drawer (3 °C) up to three months, or freeze slices for year-long use.
For baby ginger—mild, pink-skinned rhizomes—harvest at 4–5 months; no peeling required.
Pest & Disease Management
| Problem | Symptoms | Organic Solutions |
|---|---|---|
| Bacterial wilt | Curling/yellow leaves, sudden collapse | Remove & destroy plants; rotate crops; sanitize tools |
| Rhizome rot | Soft brown tissue, foul smell | Improve drainage; avoid overwatering; plant disease-free stock |
| Root-knot nematodes | Stunted growth, galls on roots | Solarize soil, add neem cake, practice crop rotation |
| Spider mites / aphids | Speckled leaves, sticky residue | Spray neem oil or insecticidal soap; increase humidity |
Healthy soil, proper watering, and clean planting material are your best defenses.
Cooking with Home-Grown Ginger: Ideas & Storage Hacks
- Stir-fries & curries: Add minced ginger with garlic and chilies to hot oil for an aromatic base.
- Immune-boost tea: Simmer sliced ginger, lemon, and honey; add turmeric for extra anti-inflammatory power.
- Quick pickles: Slice baby ginger paper-thin and soak in rice vinegar, sugar, and salt—perfect with sushi.
- Freezer trick: Peel rhizomes, grate, and press into ice-cube trays. Pop out cubes for instant recipe portions.
Frequently Asked Questions
1. How long does ginger take to sprout?
In warm, moist conditions, buds emerge within 2–3 weeks. Cooler soil can delay sprouting up to six weeks.
2. Can I grow ginger from store-bought roots?
Yes—choose organic pieces with visible eyes, soak overnight, and plant as described above.
3. Why are my ginger leaves turning brown?
Likely sunburn or low humidity. Provide filtered light and maintain evenly moist soil without letting pots dry out.
4. Does ginger need full sun?
Bright shade or morning sun/afternoon shade is ideal. Too much direct midday sun may scorch leaves.
Conclusion
Growing your own ginger root is surprisingly easy once you meet its key requirements: warmth, rich loose soil, steady moisture, and light feeding. Whether you tuck rhizomes into a patio planter or dedicate a corner of a greenhouse, the reward is a year’s supply of fragrant, flavorful ginger for cooking, tea, and home remedies. Follow the planting, care, and harvesting steps in this guide, and you will transform a humble grocery-store knob into a thriving tropical treasure—no matter where you live.

Leave a Reply